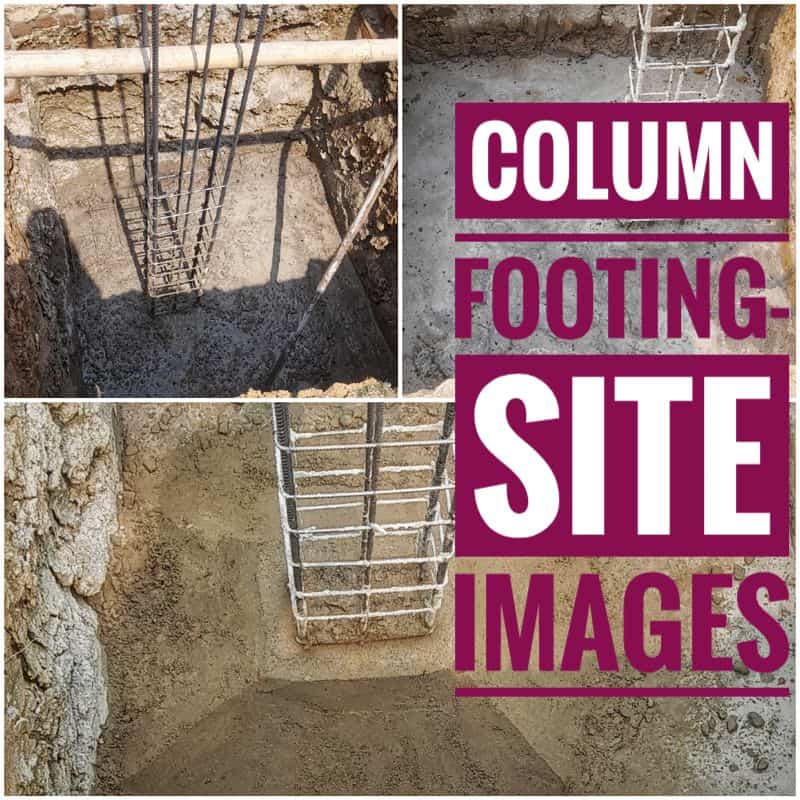
Building Foundation is the life of any building, it should be built properly as Install RCC column footing is the first step to go forward.
Today you’ll learn how to start and finish the footing column. Here we’ll Explained Step by step how to The install RCC column footing.
Trench Digging
Dig the trenches 5 X 5 ft. Use jcb or manual. Manual cost is 500/- per trench. JCB charges are 1100/- Rupees per hour. It’s only in the plan but you have to dig the trench till the hard strate is not found. For example, when your building is being constructed in a low lying area, the trench should be deep. Once the trench is complete, Finish it from all the 4 sides. Plain it from all sides and make the bottom Plain surface where the footing layout will start.
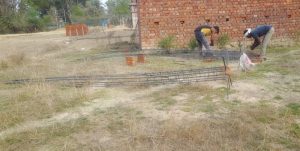
Preparation of Bars
Cut them all in proper size. For 5 X 5 ft Trench, cut the Rods in 4’6″. later 3 inches could be bent from both sides.
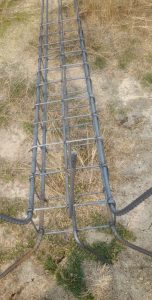
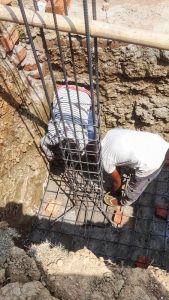
Pillar of the column
Arrange 12mm Rods in the four corners. 12 mm rod in the middle and stirrups gap 6″ each. L-shape at the end to spread the load to the wire mess.
Wire mesh (Jali) preparation
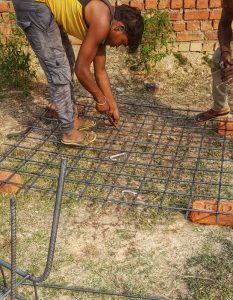
For a wire mess, you’ll need 20 pieces of 4’6″. Place each in 5 inches. And bind by wires in the junctions.
Wire Mess Bending
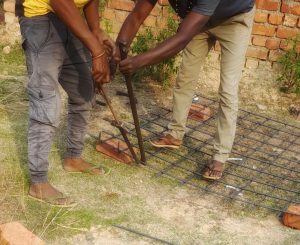
Bent from the endpoint of each bar to make grips in the concrete.
A layer of sand

A sand layer of 2 inches is spread over the 5X5 trench. Sand spreads loads of structure in all directions. Sand spread the load of the superstructure and save from the settlement.
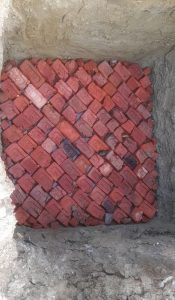
Brick Soling over the sand
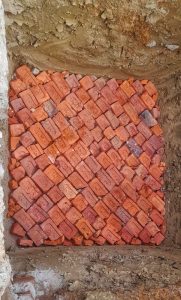
Brick soling is done over the sand. These could be of different patterns. The labour can place them in a straight line pattern or the cross pattern. But a cross pattern is considered better than a square pattern. Don’t leave any space.
Watering over the brick soling
Watering is done to soak the moisture around so that it will not absorb the water from the concrete mixture later.
Slab for the foundation
Place cement concrete slab is done for the strong base of the wire mess and pillar. Thickness must be 2 inches and will cover all the wire mess.

Centering of the column
Centering of column plays a important role in Install RCC column footing of Any Building. first Remove all the waste materials like soil pieces and use threads, meeting the other column in a perpendicular direction.
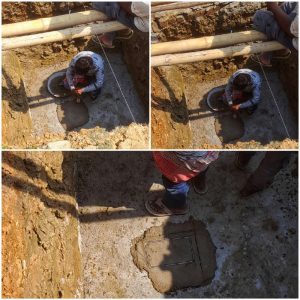
Go from one thread, and use the shovel to find two points. Align the shovel with thread and once the shovel is in a static condition, drop it immediately to find a point. The same procedure is to find other points and join them by lines.
Similarly, on the other thread, find two points using a shovel and join them by line.
Left 2-inch clear cover gap and place ring according to the column size. In the figure, the column is of size 10″ X 15″ so the ring size
7″X12″ is used and pressed to some depth.
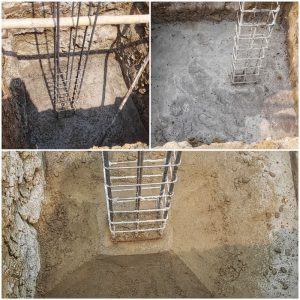
Placement of the jali and Pillar structure
After marking, place the wire mess over the 6 bricks so that there will be a 3-inch gap. Keep notice that the Rods will not touch the slab area.
Now, place the column steel structure just above the ring that’s been pressed in the cement sand mix. Try to adjust the whole structure so that it will overlap below the ring.
Again, check the alignment with the other column. If it’s correct from both directions, fix the legs L-shape in the wire mess and bind it with the wire.
Take bamboo and fix both sides using stones or bricks so that the whole structure is not distributed during the pouring of concrete mix.
Concrete mix poured over the structure
A layer of Cement paste is spread over the footing area.
Then the concrete mix is poured and vibrated so that concrete compaction takes place properly.
After that pour the concrete mix into an almost 4-inch thick layer. Then left it for a day. Another day a shape of trapezoidal is formed to support the Pillar formwork.
Conclusion
This blog will help you to construct a strong foundation Pillar for the building. Every figure used from the site will help you understand how a strong column can be made.
Also, read
Know RCC Column in Details –CLICK HERE!